Hi, I'm kabhison evans
Over the last five years starting blogs from scratch and running them, I've developed systems and processes to maximize the chances of blogging success.
I created this site to give beginners a fast, foolproof guide to starting a blog without having to learn HTML or making expensive mistakes that most people do.
This tutorial is to learn to create an effective blog So you have to read it completely.
Also you will be able to know Some of the free web hosting sites and their business ways.
So you want to start a blog. That’s great! Not only is blogging a great pastime, but with a blog, you can express yourself in a unique way, help others with problems you’ve overcome, establish yourself as an expert, and even make money.
If you’re new to blogging, it really helps to get started off on the right foot and have someone to help you avoid mistakes.
That’s why I’ve put this page together for you, to give beginners a fast, foolproof guide to starting a blog, without having to learn HTML or waste your time reading long, boring tutorials.
I’ve put this guide together for you, to walk you through the process to setup your blog in 5 easy steps.
Here’s how to start a blog:
- Choose a blogging platform.
- Register a domain name and hosting.
- Design your blog.
- Add posts and pages.
- Start growing your blog.
The goal of this page is to help you get started the right way. From years of coaching and helping people with their blogs, I’ve found that many people make mistakes when starting a blog, sometimes resulting in them abandoning the project altogether. We don’t want that to happen.
So I want you to take the time to carefully read this post. So get comfy and set aside some time; I’m going to walk you through the entire process of setting up your self-hosted blog, so you ‘get it right the first time’.
Ready to create your blog today? Alright, let’s get right into it.
Step 1: Choose the right blogging platform (WordPress)
Before you can even start worrying about how your blog will look like, you’ll need to choose your blogging platform. 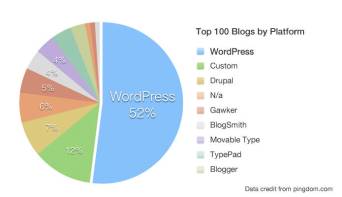

There’s a lot to choose from. You are able to create a blog with many different blogging platforms, such as WordPress, Tumblr, Blogger and more…
However, given that there are over 80 million active users using WordPress today, it’s clear which platform is the boss. Here’s why:
- It’s FREE for everyone to use (including themes, layouts, and add-ons that many other blogging platforms don’t provide).
- It’s super easy to set up.
- It’s secure; WordPress is always updating their software and keeping everything sound and secure, so there’s rarely a worry of having your blog come under hacking attacks. No wonder Facebook, NASA, and even university blogs are using WordPress.
- It’s HIGHLY customizable. There are hundreds of free themes and plugins that add more functionality to your blog, from contact and subscribe boxes to plugins that improve blog performance and more.
While the other blogging platforms are generally all pretty OK, nothing, in my opinion, has ever come close to matching the freedom and customization options that WordPress offers. So without a doubt, go with WordPress. Especially when you are just starting out.
Step 2: Finding a domain name and web hosting provider
Domain name – This will be your personal blog address where people find you over and over again. For example, Google’s Domain is www.Google.com. Your new blog domain name will be www.YourBlogName.com, except you’ll choose what’s going to be behind YourNewBlog. The cost of a domain name is usually $10/year, but if you follow this guide all the way, I’ll show you how to get one for free.
Is It Possible To Get A Domain Name For Free?
Technically NOT, because there is a fixed cost that every domain registrar have to pay to ICANN every year for a registered domain name. There is no way to avoid this fee if it’s a top-level domain like .com, .net, .in, etc.
So if a domain registrar offers a free domain name, there must be a catch! They may show ads on your site or anything like this get return on their investment. And the worse thing is, you will not own the domain name. Your domain will be registered under the registrar’s name.
So what’s the best way to get a free domain name?
The answer is, go with a web hosting provider that offers a free domain name.
Now the good news is, some of the best web hosting providers offer a free domain name. The catch is, you have to buy web hosting from them.
1. Bluehost – Get A Free Domain For 1 Year
Powering over 2 million websites worldwide, Bluehost is considered as one of the best web hosts in the world. It is officially recommended by WordPress.org. So if you are going to create a WordPress site, Bluehost should be your first priority.
Bluehost offers a free domain name for one year. You can keep it on Bluehost after one year, or you can just transfer it to any domain registrars.
2. Hostinger – Free Domain With Affordable Hosting
InMotion Hosting is another popular web hosting company that offers a free domain name. It provides fast web hosting solution with affordable price.
3. GoDaddy – $1 Per Month Web Hosting With Free Domain
GoDaddy is the largest domain name registrar that offers web hosting services too. It has a crazy deal for you. You can get a free domain name with as low as $1/month web hosting. That means you can buy both domain and web hosting for just $12 for the first year.
But there’s a catch. The renewal price is pretty high.
It’s not a big problem as you can switch to other
Step 3: Designing your blog
In this section, I’ll show you some WordPress blog basics, including:
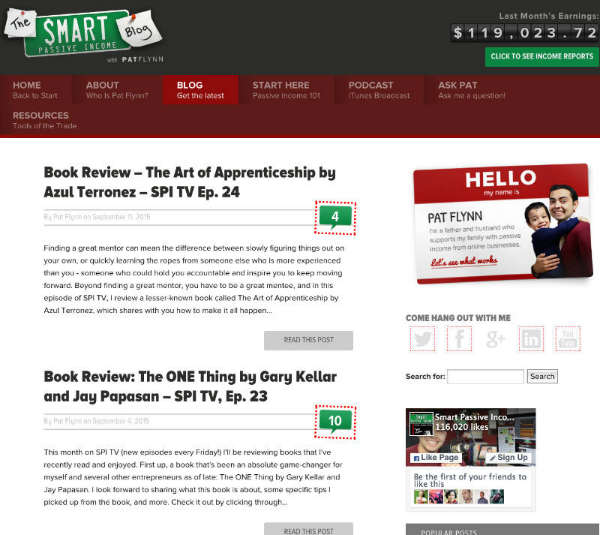
Sample of a customized WordPress blog (SmartPassiveIncome.com)
- Changing your blog’s design
- Installing new WordPress plugins/features.
- Making your blog search engine friendly
If you’ve set up your blog, you’re now ready to start using WordPress and customizing your blog. I promise – it’ll be pretty easy and fun at the same time.
Remember: You can log in to your blog by going to www.yourblog.com/wp-admin/ and using the credentials you set up with HostGator or any other hosting company you used.
Here’s how to find and install a theme you love:
When you log in for the first time, you’ll see a dashboard or admin panel that looks something like this:
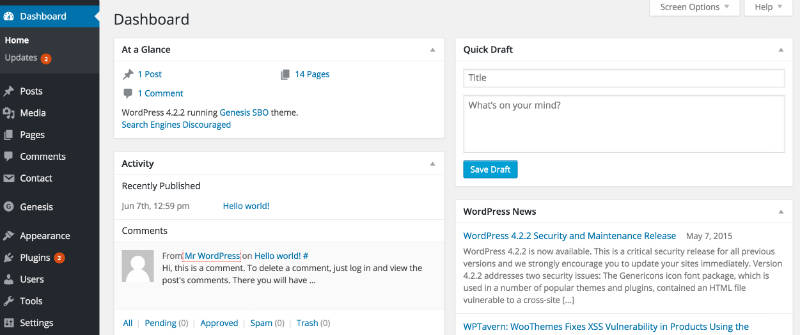
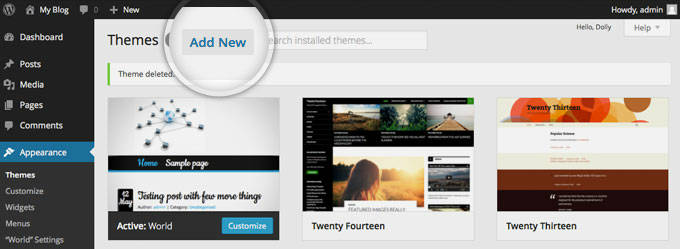
Mouse-over the “Appearance” tab in the WordPress sidebar, then click on “Themes”.
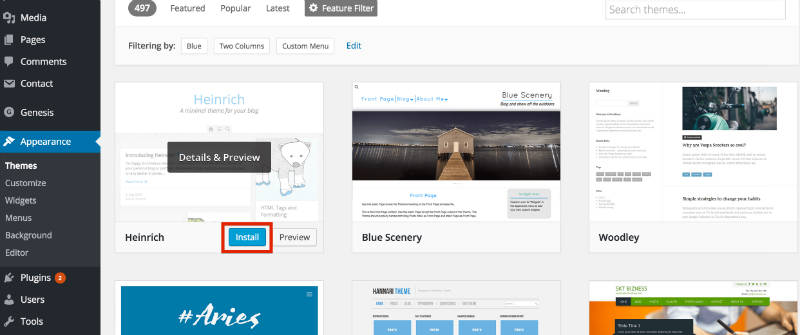
On the next screen, you’ll see several themes are already installed. If you don’t like those, click the “Add New” button at the top, or the great big “Add New” square to start searching for a theme.
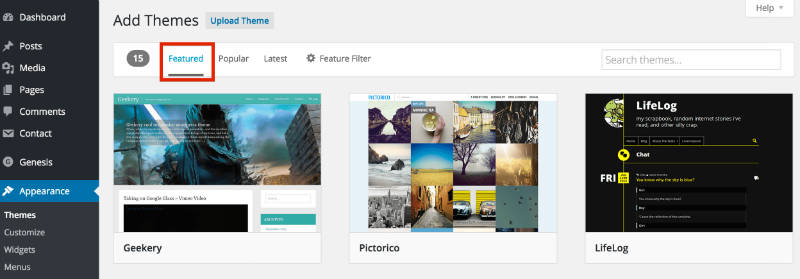
Now, you’ll see tabs where you’ll find featured, popular and brand new themes, as well as a “Feature Filter” and search bar.
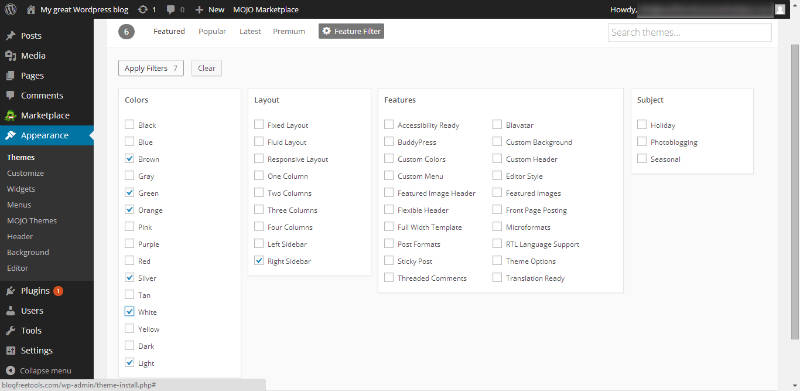
I really like the “Feature Filter” option, because you can choose themes in certain color schemes, select specific layouts and even choose themes with built-in advanced features.
Just choose the options you want, then click “Apply Filters” on the left hand side. If you’re finding this challenging, just search by keyword – there’s no wrong way!
When you’ve found a theme you like, click “Install”. You’re nearly done!
Once the theme has been installed, all that’s left to do is click “Activate” on the next screen:
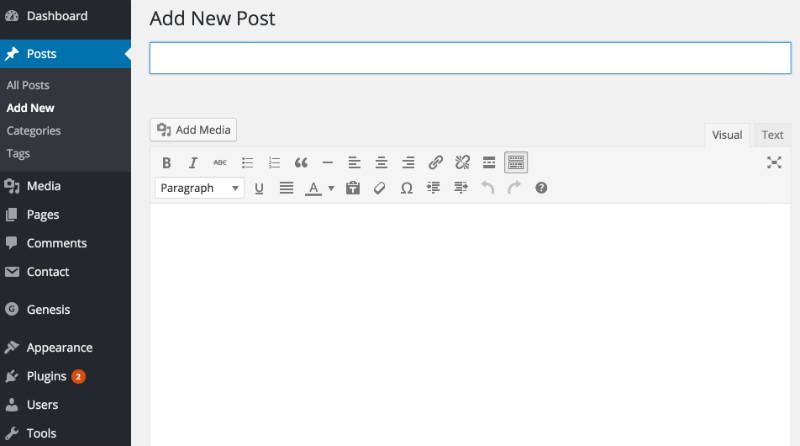
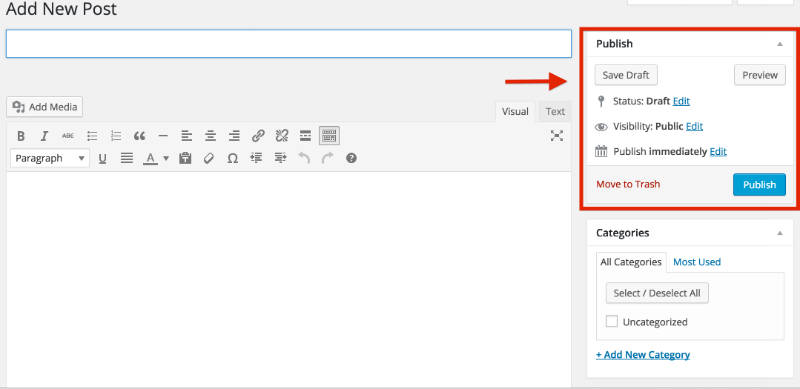
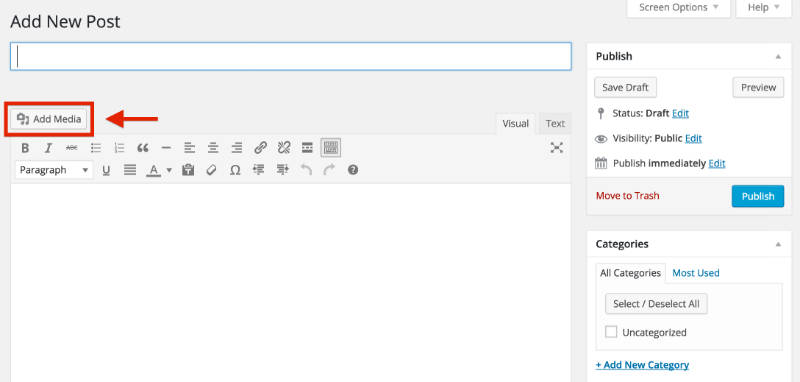
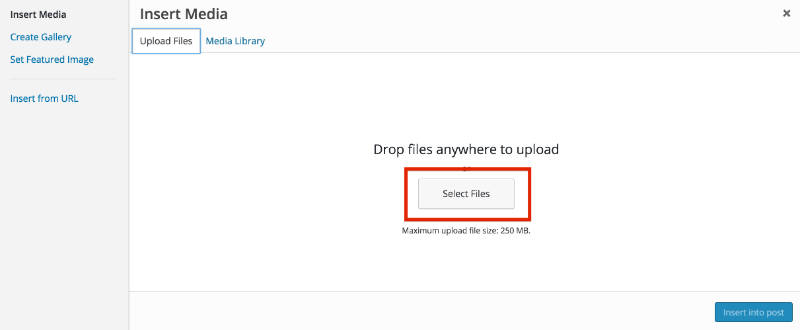

Comments
Post a Comment